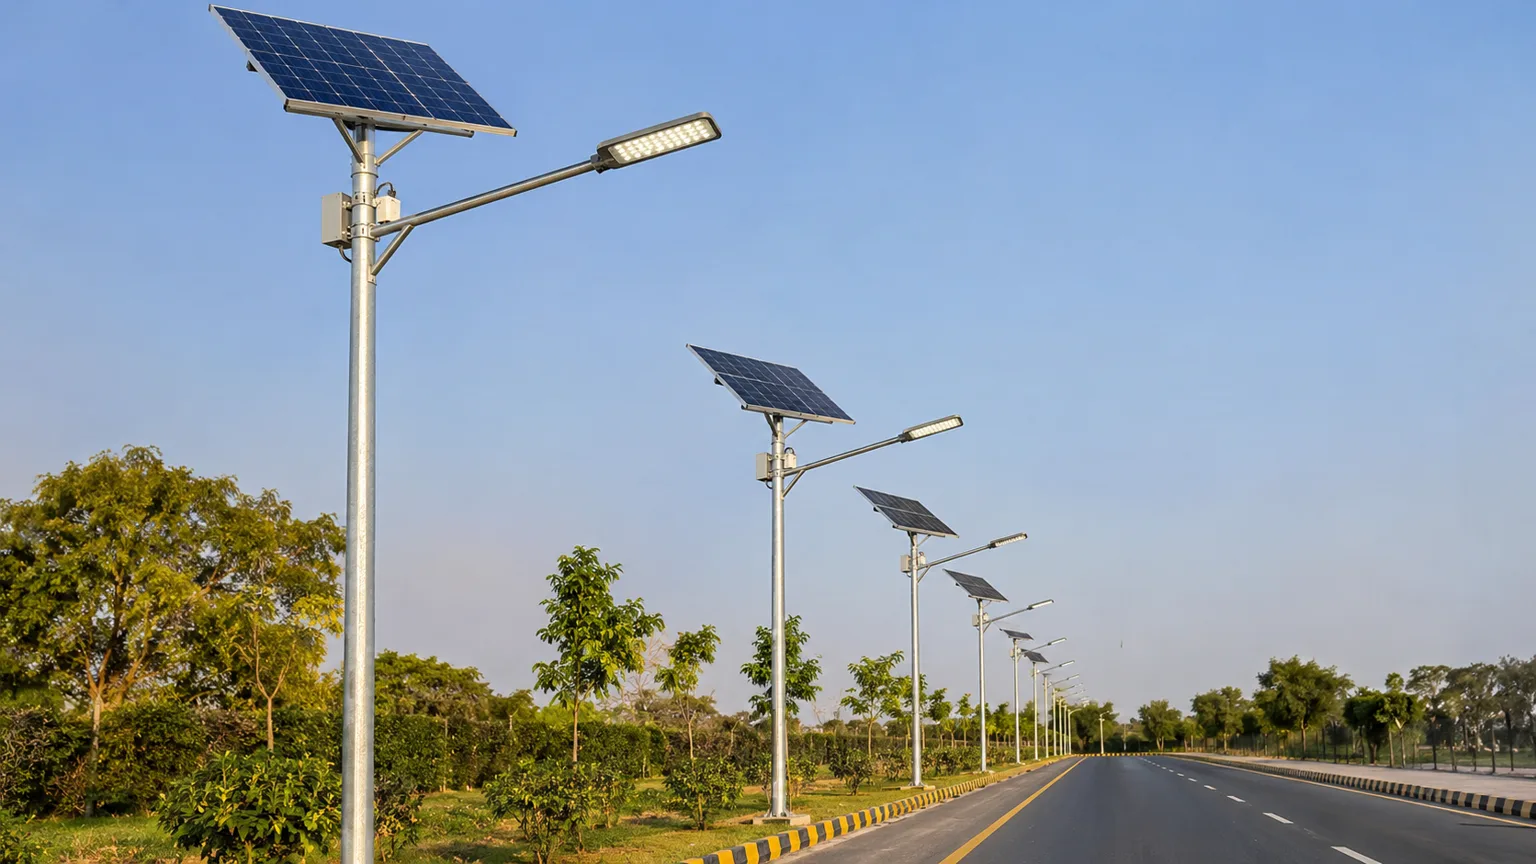
A solar street light is only as good as the pole it stands on. The pole sets the mounting height, and the height decides how far apart the lights can be, how evenly the road is lit and, in the end, how many lights a project needs. The pole also carries the solar panel, so it has to withstand more wind than an ordinary lighting column, for twenty years or more.
Yet poles are often the last item considered in a solar street lighting project. This guide brings the whole decision together: how to choose the height, the material and coating, the wind rating and the foundation, with a checklist to use before you order.
Why the Pole Matters More for Solar Street Lights
On a grid-connected street light, the pole holds a luminaire and a cable. On a solar street light, it also holds a solar panel and, depending on the design, a battery. That changes three things:
- More wind load. The panel acts like a small sail at the top of the pole, so the pole, base plate and foundation must handle a larger bending force at the base.
- Height and shading. The panel must sit above shade from trees and buildings, which can push the pole higher than the lighting alone would need.
- No second chance. Replacing a pole after installation means new foundations and traffic disruption, so the choice has to be right the first time.
Step 1: Choose the Height
Pole height depends mainly on the road width and the light level the road needs. As a general guide:
- 3 to 5 metres: footpaths, parks, gardens and cycle paths, where low, comfortable light is wanted.
- 6 to 8 metres: residential streets, village roads and car parks, the most common range for solar street lights.
- 8 to 10 metres: main urban roads, industrial estates and wider rural roads.
- 10 to 12 metres and above: highways, interchanges and large yards, where wide coverage is needed.
Taller poles light a wider area and allow wider spacing, but they need more powerful luminaires, larger panels and stronger foundations. Lower poles give more even light on narrow roads but need more poles per kilometre. Our comparison of 6, 8 and 10 metre poles looks at this trade-off in detail.
The right answer for a specific road comes from a lighting calculation, not from a table. A DIALux lighting design tests the proposed height, spacing and luminaire against the required lighting class and shows the most economical combination.
Step 2: Choose the Material and Coating
Galvanised steel
Hot-dip galvanised steel is the most common choice for solar street light poles. It is strong, widely available and economical. The zinc coating protects the steel from rust, and a powder coat on top adds colour and extra protection.
Aluminium
Aluminium poles are lighter and naturally resist corrosion, which makes them useful in coastal areas and where poles must be carried by hand. They cost more and need careful design for taller heights and higher wind loads.
Coating for the climate
In coastal, humid or industrial areas, corrosion is the main threat to pole life. Specify the galvanising thickness, a quality powder coat and stainless or galvanised fixings. Our guide to preventing solar street light pole rust covers the details.
Step 3: Check the Shape and Wall Thickness
Poles come in conical (tapered), octagonal and round-stepped shapes. Conical and octagonal poles carry load efficiently and are the most common for street lighting. Whatever the shape, the wall thickness must suit the height and the load at the top. Ask the supplier for the wall thickness, the base diameter and the base plate size, and how they were calculated.
Step 4: Match the Pole to the Light Design
The type of solar street light changes what the pole has to carry:
- All-in-one solar street lights combine the panel, battery and LED in one compact unit, usually mounted on a short arm or directly on top of the pole. The load is concentrated in one place and the pole design is simple.
- Split type solar street lights mount a larger panel separately, at the best angle for the sun, with the luminaire on an arm. The pole needs a panel bracket and must carry the panel’s wind load at the top.
Arm length and angle also matter: the arm places the light over the road, and its length should come from the lighting design.
Step 5: Design for Wind
Wind is the biggest structural force on a solar pole. The design must consider:
- The design wind speed for the site, from local codes or the project specification.
- The area of the solar panel and luminaire exposed to the wind.
- The pole height, shape and wall thickness.
- Local factors such as open terrain, coastal exposure or hilltop sites, where wind is stronger.
On projects in high-wind or cyclone regions, ask the supplier for a structural calculation for the pole and foundation, and have it checked by a qualified engineer.
Step 6: Plan the Foundation
The foundation holds the pole upright against wind for its whole life. Its size depends on the pole height, the wind load and the soil. Most solar street light poles are fixed with anchor bolts cast into a reinforced concrete foundation, with the base plate levelled on nuts and the gap grouted.
Good practice includes a soil check on larger projects, correct anchor bolt templates so the base plate fits first time, enough curing time for the concrete before the pole is raised, and drainage so water does not collect around the base. Our step-by-step solar street light installation guide covers the site work.
Step 7: Plan for Safety and Security
On highways, the position of the pole must follow road safety rules, such as distance from the carriageway or the use of crash barriers. In areas with theft risk, anti-theft fixings, a locked handhole cover and batteries mounted at height make the system harder to tamper with. Local rules on pole position and height may also apply, as explained in our article on street restrictions for solar light poles.
Common Pole Mistakes on Solar Projects
- Choosing the height by habit. Copying the height from an old grid project, instead of a lighting design, often leaves dark gaps or wastes poles.
- Forgetting the panel’s wind load. A pole rated only for a luminaire can bend or fail once a solar panel is added at the top.
- Thin coatings in harsh climates. A pole that looks fine on delivery can rust within a few years near the coast.
- Mismatched parts. Poles, arms and panel brackets ordered from different suppliers that do not fit together on site.
- Rushing the foundation. Raising poles before the concrete has cured, or setting anchor bolts without a template.
- Ignoring shade. A pole that is tall enough for the light but leaves the panel in the shadow of trees or buildings for part of the day.
Each of these is cheap to avoid at the design stage and expensive to fix once the poles are standing.
Checklist: 10 Questions to Ask Before You Order
- What height does the lighting design recommend for each type of road?
- What is the pole material, wall thickness and galvanising thickness?
- Is the pole rated for the design wind speed at our site, including the solar panel?
- Is there a structural calculation for the pole and the foundation?
- What are the base plate and anchor bolt dimensions, and is a template supplied?
- Does the arm length and angle match the lighting design?
- Is the panel bracket adjustable to the best angle for our latitude?
- What coating is used, and is it suitable for coastal or humid conditions?
- What anti-theft and safety features are included?
- What warranty covers the pole, and how are poles packed for shipping?
Frequently Asked Questions
What is the most common pole height for solar street lights?
For residential streets and village roads, 6 to 8 metres is the most common. Main roads usually use 8 to 10 metres, and highways 10 metres or more. The lighting design for the specific road gives the final answer.
How far apart should solar street light poles be?
Spacing depends on the pole height, the luminaire’s light distribution and the required light level. As a rough guide, spacing is often three to four times the mounting height, but a lighting calculation should confirm it for each road.
Do solar street lights need stronger poles than normal street lights?
Usually yes, because the solar panel adds wind load at the top of the pole. The pole and foundation should be designed for the panel area as well as the luminaire.
Which is better, steel or aluminium poles?
Galvanised steel is the most common and economical choice for most projects. Aluminium is lighter and resists corrosion well, which suits coastal sites and projects where handling is difficult, but it costs more.
Can the supplier provide the poles with the lights?
Many manufacturers supply complete systems, including poles, arms, brackets and anchor bolts, designed together with the lights. This avoids mismatches between the pole, the bracket and the luminaire on site.
Get the Pole Right From the Start
The pole is the longest-lasting part of a solar street light, and the one that is hardest to change later. Choosing the height from a lighting design, the material and coating for the climate, and a wind rating that includes the solar panel keeps the project safe and efficient for decades. DEL’s German-engineered solar street lights are specified for pole heights from 2 to 14 metres, and our engineers recommend the pole height and spacing for your roads as part of a free DIALux design. Browse our solar street light products or talk to a project engineer.