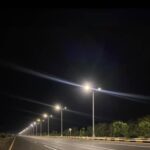
Are you thinking of getting yourself a solar LED street light soon? If you are, then you can be confident that you have made a wonderful decision to do so. Many people around the world today are constantly getting up and changing their minds as regards the conventional street lights. Integrated solar LED street lights looks to be the best bet right now. However, for many persons who have decided to make this move, one of the problems which they might be facing would be the problem relating to the installation of these street lights. Are you also facing this problem? Here are some steps which you should follow to ensure a successful installation process.
Preparation
The first thing you would need to do would be to prepare. There are many things that are involved when it comes to the installation of these street lights. First, choose a suitable area. It is recommended that you choose an area which is directly affected by sunlight as it gives it enough room to charge and renew itself. Once you have identified the area which you want to erect it, then make sure that you guard the place with lines. These lines would help direct persons who are not experts to avoid places within the construction radius.
Next, you should familiarize yourself with the manual which comes with the integrated solar street lights and makes sure that you are with the complete kit. Some of the things which should be in that kit would include your solar panels, panel flange and so much more. However, some parts might be already integrated so there might be no time to carry them in the kit.
Foundation
Once you have had the preparation stage all figured out, the next thing to do would be to install the foundation. Make sure that the surface which you are using is flat and have no bent patterns. Take your basis cage and screw it to the ground. It is always advisable to go with four screws. This is to ensure that it is fastened to the ground. After this has been screwed, use concrete mixtures to make sure that the foundation is solidified with the ground. Once this is done, you can now move on to the next stage.
Installing your battery box
Installing your battery box would also mean that it is time to install your battery. So make sure that your battery has been securely placed inside your basis cage. It is often advised that you place your battery underground as this would prevent the direct impact of the sun. it should be about 600mm below the surface. Make sure that you look at the manual to understand how the electrical connections would go. Note that this is one of the few places where your solar street lights would need to be connected through wires. Not perfecting these connections could lead to problems in the future.
Solar Street lamp installation
Now, it is time to fix up your street light. This process would start with lifting your pole of the ground. Make sure that it is off the ground by just 1 meter. You can ensure you get this precisely through the help of a supporting bench.
Once you have raised up your pole, then you should take the solar panel package and the brackets that are meant to fasten it to the pole. Place them where you wish them to be and secure them by means of bolts. It is important to remember to handle your solar panels with care as they are really the primary unit when it comes to keeping your solar system working efficiently. Make sure that you know the interrelationship within the system. In other words, make sure you get the connections between the solar panels, the batteries and other units right.
Once you have got this figured out, the next step would be to install your lights onto the pole. Place your LED light fixtures on the ground. Make sure that it is facing upwards. The next step would be to press the buttons that are located on both sides. Now, take your lamp holder and have it screwed into your light fixture. Since we are using LED lights, you should put an LED bulb into the lamp holder.
Check the connections
Once this is done, it is time for you to check the entire process to make sure that you have done the job correctly. Some of the things which you would need to focus on would be the wire connections in your batteries and the components which form part of the circuit in your pole. Make sure that everything is well connected and that the chances of an accident are next to none.
Erecting your pole
Now, all you have to do is to make sure that your lamp pole is erected. This can be easily accomplished by way of a crane. Make sure that the lamp pole laps perfectly with the bottom plate. One this is done, then you are mostly good to go.
One more thing. Just make sure that your controller is inside the lamp pole. This would help you to use your solar street lights effectively. Having your controller inside and well-connected is the last piece of the puzzle and a very important one at that.
integrated solar LED street light: Conclusion
There is a reason why everyone loves to use Integrated solar LED street light. One of those reasons is that it makes life easier and the installation process is faster. Most of the components might also be integrated into it. In other words, you might not need to follow all the installation steps which are listed below. If you wish to get these integrated solar led street light, then DEL Illumination would be the perfect place to go. They have some of the best integrated solar street lights right now. You would surely be satisfied with their quality and durability.


