In this age of development, when paying attention to energy conservation is at its peak, the use of smart technology like automatic street lights can save a lot of power. Automatic Street Light Using LDR circuit is a simple and powerful concept that uses a transistor as our primary control component for making an automatic street light. Beginner Home Automation Project This is the perfect project brought to you by DEL for those who want to learn more about electronics and automation.
In this guide, we’ll walk you through the process of designing an automatic street light using LDR in 6 easy steps. By the end of this project, you’ll have a working model that you can install outside your home or in any area where automated lighting is needed.
What is an Automatic Street Light?
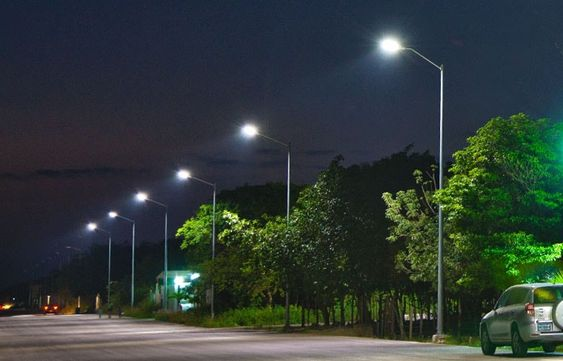
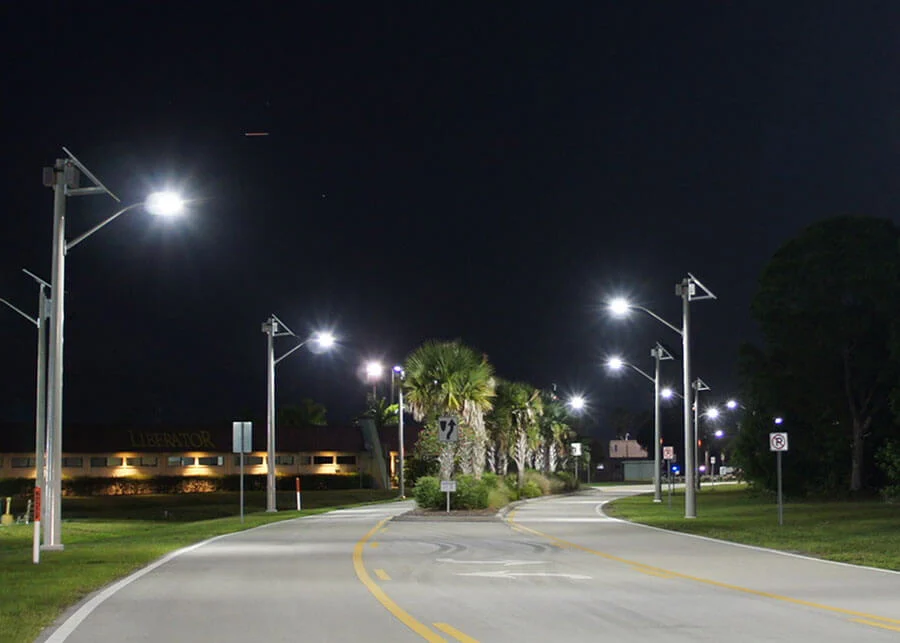
Automatic Street Light is such a kind of lighting system where the light will automatically turn ON and OFF implemented for usage to reduce power consumption. It is applied extensively for street lights which light the parking areas and other outdoor locations, thus improving security requirements in a locality as well lowering energy consumption.
This system uses an important principle LDR (Light Dependent Resistor) is used as a sensor to detect the light surrounding in that environment. Even when light levels fall, for instance at nightfall the system activates. The system is programmed to switch them off when daylight returns.
Importance of Automation in Street Lighting Systems
Street lighting automation leads to several benefits such as:
- Energy efficiency: The street light automatically turns on low wattage when only few pedestrians move across the road and this helps in reducing energy.
- Cost-effectiveness: Less resource consumption leads to lower electricity bills, basically making it an economic solution at the end of the day.
- Increased safety: Automatic street lights can reduce accidents and help keep communities safe by ensuring that areas remain well lit throughout the night.
They are commonly used in public infrastructure, residential areas and commercial properties. The automatic street light project detailed in this guide is a basic model and comes with the option to scale it up, depending on your specific requirements hence being well suited for small applications all the way up to more intricate setups
What is an LDR (Light Dependent Resistor)?
Overview of LDR
A light dependent resistor (LDR) or a photoresistor is an electronic device whose resistance changes as the amount of incident light on it varies. The LDR resistance is high in the dark and decreases when light falls on it. Its special property makes it perfect to be used in projects like automatic street light
In this project, LDR is used as a sensor that detects the light levels and sends signals to other components in the circuit. Using these signals street lights are controlled.
How LDR Works in Street Lighting
The resistor here takes the place of LDR which senses the light. As it is an LDR, a decrease in the resistance occurs with falls of amounting light on it where sunsets. This in turn causes the other parts in the circuit, like a transistor to light up, say an LED.
In the day, when there is enough sunlight then the LDR resistance goes too high and there is no flow of current to operate the light so the lamp will switch off. This means the light is only on when needed, so less energy goes into making it work.
Components Needed for the Automatic Street Light Using LDR
List of Materials
To create your automatic street light using LDR, you’ll need the following components:
- LDR (Light Dependent Resistor): The Prime sensor used to find out the intensity of light inside a square.
- Resistors: Regulate the microcontroller current and voltage to protect it from damage.
- Transistor: Acts as a switch to power on when light comes or off based on the LDR signal.
- LED Light: LED light, the physical bulb that emits the light for your project. The smartest thing to do would be getting your hands on the ones that use LEDs that are energy saving and for outdoors.
- Power Supply: This circuit requires an external power supply i.e. a battery or transformer which is [provided] isolated from the target card to make sure that it does not disturb its normal operation by injecting noise into main connected I/Os.deltaTime POWER.
- Connecting Wires:These allow the components together to complete a circuit
- Breadboard or PCB (Printed Circuit Board): Here you arrange the components for test and assembly.
Understanding the Automatic Street Light Circuit Diagram
Understanding the circuit diagram of an automatic street light control system is needed in any project. It is illustrated in the diagram how all components are connected, such as LDR, transistor and LED. The place in a circuit that are important:
- LDR and Resistor: Light intensity depends on voltage to the transistor using this circuit.
- Transistor: It works as an electronic switch and is controlled by the signal from LDR. What happens when this transistor is turned on is it essentially allows that power to flow through via the LED light.
- LED Light:The circuit’s output, this lights up when the light levels are low enough.
Understanding this diagram helps you accurately build the circuit and troubleshoot any issues that may arise.
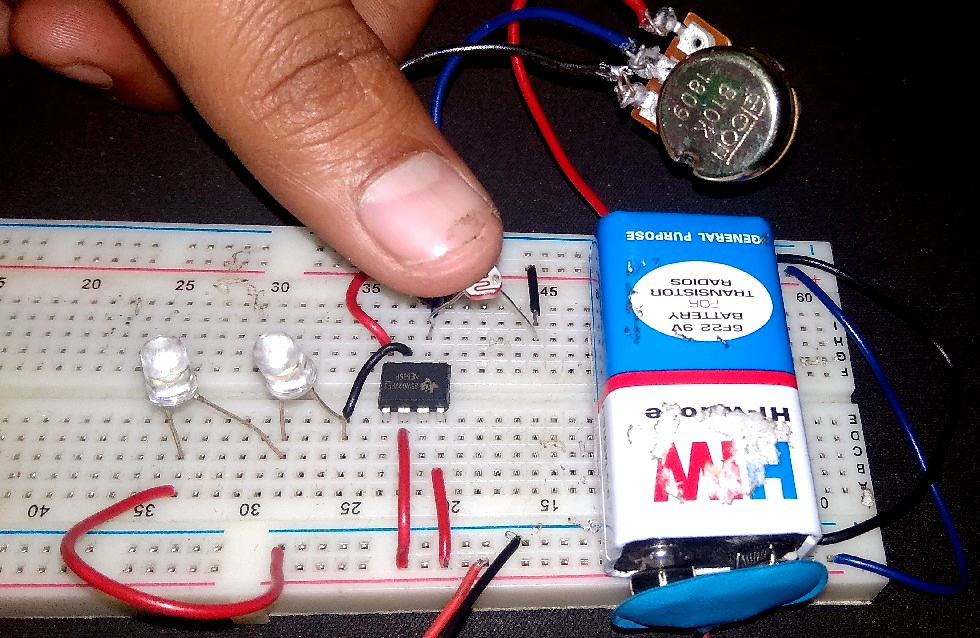
Step 1: Designing the Circuit
Circuit Diagram of Automatic Street Light using LDR The first thing to do is hurt components’ breadboard to make sure the configuration works before you permanently solder everything on a PCB.
Here’s what you’ll do:
- For LDR to detect light, you should properly put it there.
- However; hook the resistors up to drop current.
- Now put the transistor and it will serve as a switch for on/off light.
- Finally, hook up the LED light to the circuit so that it receives power when necessary.
Tips for Circuit Design
- The rest are resistor values chosen for the LDR to be sensitive correctly.
- Re-verify that you have wired all the components correctly in your connections.
- First, check the streetlight automatic system by doing changes in LDR before soldering.
Step 2: Placing the LDR in the Circuit
The LDR is the most essential component of this system, as it decides when to turn on and off light. Put LDR correctly.
Here’s what to do:
- LDR should be Left of the Exposure to Outside Light Indoors if you want to check it in NIGHT conditions,just cover the LDR with your hand or OFF the room lights.
- Here LDR should be connected in series with a resistance for the creation of a potential divider. In this way, the circuit can accurately identify changes in light levels.
Proper Placement of LDR (Light Dependent Resistor) ensures proper functioning of Automatic Street light. If it does not, the light may refuse to turn on from sunset till sunrise or will burn 24/7.
Step 3: Adding the Transistor for Switching
The transistor works like a switch in the automatic street light system. The LDR, which determines light levels for the sensor, sends a signal to the transistor that controls if current can flow and enables LED light.
Why a Transistor is Needed
The LDR is not significant enough that it can directly on/off lead in an automatic street light project. And therein lies the transistor. The transistor takes this small signal from the LDR and amplifies it, so that we can use a reasonably high current to drive the light.
Here’s how to add the transistor:
- Connect the transistor to your circuit, making sure it is in a proper position with respect to the LDR and resistor.
- The base of the transistor connects to outs from a voltage divider made with LDR and resistor. If the light level is low, it will provide base voltage and enable the transistor to allow current in the latch system through its collector-emitter path driving power LED.
In fact it is an important part of the automatic street light control system to make sure that lights should be on only when there is a requirement otherwise they would remain off.
Step 4: Connecting the LED Light
After the LDR and transistor are connected, follow by connecting the LED light. The main light of this project is led, which will be automatically turned on when the surround is dark.
Here’s what you need to do:
- Connect the positive lead of the LED to the power supply, ensuring it’s in the right position.
- One end of the negative wire will be connected to a transistor that current can provide for when it turns on.
Why Use LED Lights?
The best part of using LEDs in automatic street light systems is that they use very less power, and type LEDs can give thousands of hours or really ten thousand more than a flushing system which at an equal time produces bright lights. Outfit your project with LEDs and lower energy costs, as well as maintenance that is significantly less than on conventional light bulbs.
Step 5: Testing and Troubleshooting the Circuit
Once you have created the circuit, before assembling it is now time to test your automatic street light. You can do this by shining higher and lower amounts of light on the LDR, to see how this affects what the LED does
How to Test the Circuit
- This energy is being burnt which provokes the LED to turn ON and as long as we are in a sufficiently lit environment, LDR detects light so it will not allow the LED.
- You should cover the LDR to simulate darkness and then LED would be on.
- You should also test the system under normal conditions, and if needed, put it on outside in life to see how LDR reacts with sunlight throughout a day.
Common Problems and How to Fix Them
- LED doesn’t turn on: This may be due to wrong LDR placement or current limiting resistor values might have been judged incorrectly. This LDR can be sensed by the analog input A0, but if its resistance is too high (it will work better at low light) it may not detect a change in illumination.
- LED stays on during the day:If the LED continues to stay on during the day, it could be due to insufficient light falling onto LDR or resistor values may require attention.
- Circuit overheating: Use the appropriate resistor to control current so that heating does not occur as this would damage them.
The operation of the automatic street light system needs to be tested after final programming.
Step 6: Finalizing and Installing the Automatic Street Light
Now if the test circuit is working correctly, this project should be a wrap. This includes migrating the components from a breadboard to a more long-term setup such as making use of PCB (Printed Circuit Board) and then setting up the system where it is required.
Installation Tips
- Outdoor Placement: if the automatic street light is placed outside with a black fixation LDR so that it may not be affected by other lights. The LED as well as the other components also need to be weatherproof for protection against rain, dust or extreme temperatures.
- Sealing the Circuit:Put a protective cover on top of your circuit to prevent outside elements. For added energy savings, you can run the system on a solar panel.
Installation is the first step to take for your automatic street light system installation and ensures that it will properly work in years without any maintenance.
Working of an Automatic Street Light Using LDR
These systems are such that once they are installed then as a whole these automatic street lights using LDR keep on tracking the amount of light which falls around them. The LDR that is used in the project has high resistance during the day so no current flows through it to switch on led light. When the day transitions into night and light intensity decreases because of this, LDR has a lower resistance so more valuables can pass through the base circuit therefore powering on our lovely LED.
The system is fully automatic, so you never have to manually switch on or off the lights. Not only does this save time, but also avoid the waste of energy.
Advantages of an Automatic Street Light System
Energy Efficiency and Cost Savings
The most obvious advantage of an automatic street light system is that it saves energy. Due to the fact, the lamp is activated when needed, wasted energy consumption is entirely absent. Additionally, it is beneficial in terms of costs, especially for extensive projects that reflect entire streets or parking lots. The more, the more money saved. Moreover, in the long term, the benefit is evident, as only income is used to operate the light.
Low Maintenance and Durability
Automatic street lights hardly require maintenance. Especially lamps equipped with LEDs, as they can last for years and seldom require replacement or repair.
Scalability for Larger Systems
The project of automatic street lights can be replicated on a larger scale. Rather than relying on a small number of lamps, dozens, hundreds, and even thousands of lights can be combined with a larger power source. Due to this fact, the solution is practical and flexible, with which the entire street or parking can be illuminated. And there are also many factors that affects the prices of solar lights.
Automatic Street Light Applications and Use Cases
Where Can You Use an Automatic Street Light?
An automatic street light using LDR can be used in various settings, including:
- Residential areas: Residential areas for the safety and ease of homeowners..
- Parking lots: Adequate lighting so vehicles and pedestrians are visible after dark.
- Public roads and highways: In an effort to improve visibility of murky driving situations throughout the world, this has become more common in recent years.
- Gardens and walkways: Improving outdoor environments without the need to waste energy..
It has enough flexibility to address all sorts of workflows, from small and specific workarounds right up to fully end-to-end industrial level pipelines. And if you want to know more about the solar lights for small places, you can read this too by clicking on the link.
Conclusion
Automatic Street Light Using LDR is a simple project which I can do at home that gives an idea about the basics of electronics and automatic street light energy efficiency. These 6 simple steps will help you create an efficient lighting system that is both low-cost and doesn’t require manual control. Whether you are just illuminating a patch in the yard or preparing for bigger installations this is an easy yet brilliant way to get into automated systems.
A very simple and interesting automatic light system that must be implemented outside the house, nothing more than an LDR (a form of resistor that drastically changes resistance based on how much light shines at it) can do wonders.
Take the first step toward energy-efficient lighting! Build your automatic street light using LDR today and enjoy hands-free convenience. Ready to get started? Follow DEL easy guide and light up your space effortlessly
Frequently Asked Questions (FAQs)
1. How does the LDR help in controlling the street light?
This LDR changes its resistance according to the ambient light levels. The LDR resistance reduces as the intensity of light decreases and allows circuit to activate street light
2. Can the automatic street light system be powered by solar energy?
An automatic street light with LDR can simply merge with solar panels for pairing. This not only enhances the energy-efficiency and sustainability of said system, it also offers complete off-grid-ability.
3. Is the system weather-resistant for outdoor use?
It is essential to utilize outdoor grade components and boxes when the unit or system will be placed outside due weather conditions like rain, dust and fluctuation of temperature. The LED and the circuit should be sealed in a waterproof casing to prevent rain water seeping into it, which helps for long durability.
4. Can I use different light sources other than LED for this project?
While LEDs are the best choice due to their low power consumption and considerably high life span, you can use other light sources for this project. Still, because of their relatively low-power and high efficiency LEDs are the practical alternative.
5. What happens if the LDR fails?
The LDR failure is a reason for not working properly on the automatic street light control system. In a few situations, the light can be stuck on continuously and in others it may not even flash. Ensure to check and change the LDR as needed.
6. Is this project suitable for beginners?
Absolutely, yes making a project automatic street light using LDR is the best idea for new projects. The circuit is easy and simple to design using readily available components. Added bonus of teaching you some electronics and automation hands on.